Setting Up an App Cluster
Connecting an App Cluster to the Klutch Control Plane allows developers to provision data services using an automation backend. This guide walks through the binding process, including authentication, deploying the konnector (a Kubernetes Deployment), and enabling Klutch APIs in the App Cluster.
Prerequisites
Before you begin, ensure you have the following:
- A running Kubernetes cluster
- kubectl installed and configured to interact with your App Cluster
- Network access to the Klutch Control Plane cluster
- OIDC credentials for authentication, provided by your platform operator or the team responsible for setting up the Klutch Control Plane Cluster
Installing the Klutch-bind CLI
Before binding an App Cluster, install the kubectl-bind plugin (which we refer to as the klutch-bind CLI) and add it to your system’s PATH.
- MacOS
- Linux
- Windows
Download links:
Open the folder to where you downloaded the file and open a terminal window
I. Create a new directory to add to your PATH environment variable
mkdir -p <installation-directory>/bin
II. Give the folder executable permission
chmod 755 <installation-directory>/bin
III. Copy the binary to the newly created folder
cp ./kubectl-bind <installation-directory>/bin
IV. Add the path to PATH environment variable
export PATH=$PATH:<installation-directory>/bin
V. If everything is configured correctly you should see some output when you run the following command
kubectl bind
When running the command above, you might encounter the error message:
'kubectl-bind' can't be opened because Apple cannot check it for malicious software.
To resolve this error, you can follow the instructions provided here.
Download links:
Open the folder to where you downloaded the file and open a terminal window
I. Create a new directory to add to your PATH environment variable
mkdir -p <installation-directory>/bin
II. Give the folder executable permission
chmod 755 <installation-directory>/bin
III. Copy the binary to the newly created folder
cp ./kubectl-bind <installation-directory>/bin
IV. Add the path to PATH environment variable
export PATH=$PATH:<installation-directory>/bin
V. If everything is configured correctly you should see some output when you run the following command
kubectl bind
Download links:
Open the folder to where you downloaded the file and open a terminal window
I. Create a directory anywhere you feel is appropriate and move the executable to that folder.
II. Copy the path of the folder containing the executable.
III. Right-click My Computer(either on the Desktop or the Start menu) and click Properties.
IV. In the System Properties dialog box, click the Advanced tab and click Environment Variables.
V. In the top list, scroll down to the PATH variable, select it, and click Edit. Click New and enter PATH for the Variable Name. In the Variable Value box, scroll to the end of the variable. If there is no semi-colon (;) at the end of the current path, add one, and then enter the path to the executable folder. Finally, click OK.
VI. If everything is configured correctly you should see some output when you run the following command
kubectl bind
Binding to Klutch APIs
Binding to Klutch's APIs allows the App Cluster to provision and manage data services through Klutch.
Execute the following command, replacing <backend-host> with the hostname of the Klutch Control Plane:
kubectl bind https://<backend-host>:443/export --konnector-image=public.ecr.aws/w5n9a2g2/klutch/konnector:v1.4.0
The following actions will be performed as a result of this command:
-
The kubectl-bind plugin initiates the OIDC authentication process and automatically installs the konnector in the App Cluster during the first binding request.
-
A browser window will open, prompting you to log in with your OIDC credentials. Grant access to the OIDC client and confirm in the terminal when prompted.
The API binding process must be completed one service at a time. If binding multiple services, repeat the kubectl-bind command and log in again as needed.
Once authentication is complete, you can select the service to bind using the Klutch web UI, as shown in the following image:
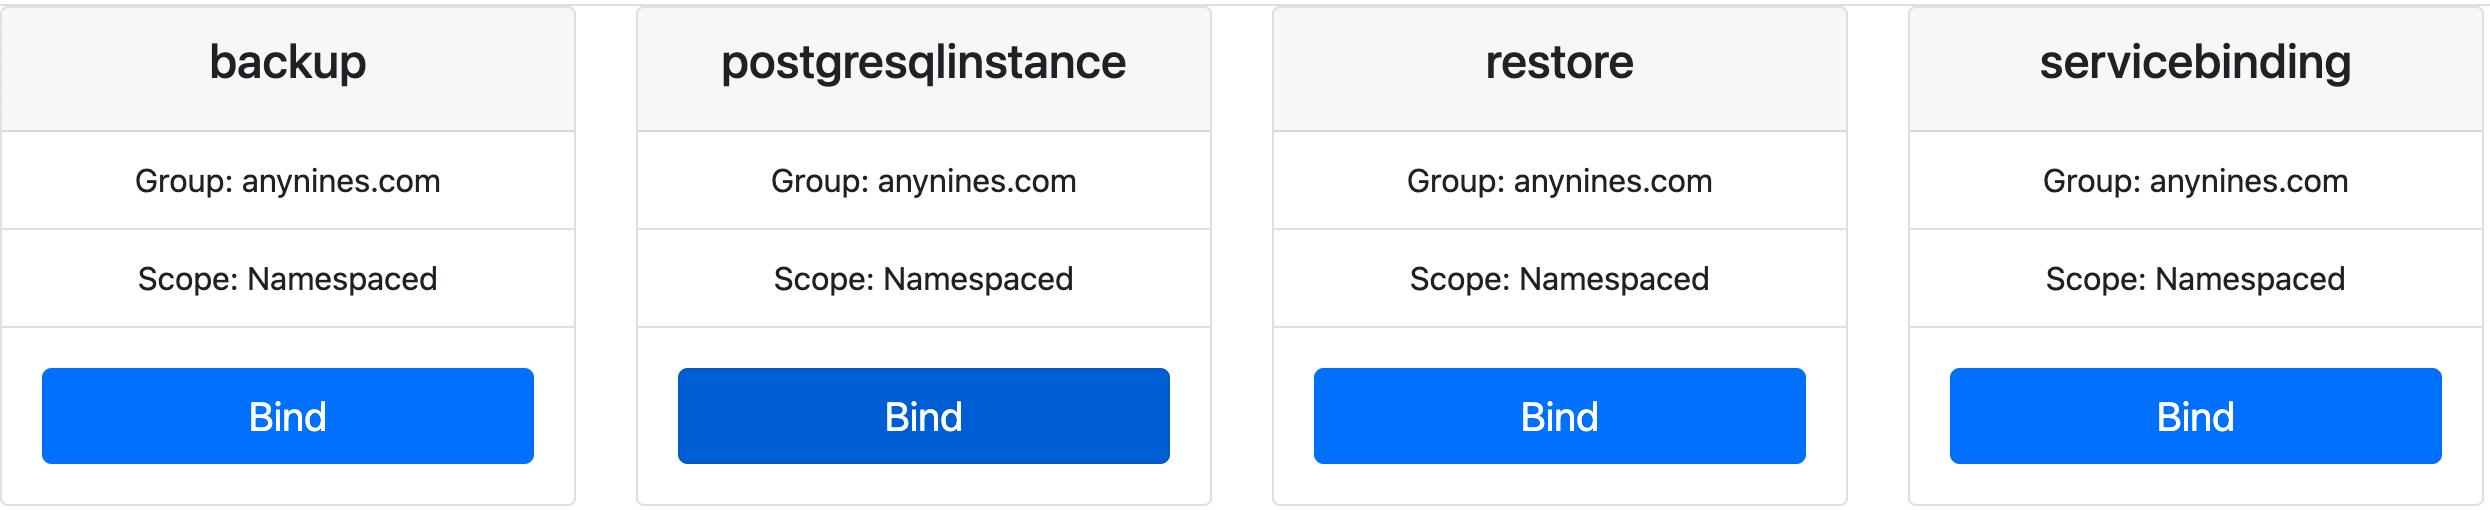
You can now start provisioning data services, your App Cluster is fully configured and ready to go! 🚀
Installing konnector without kubectl-bind (Optional)
For automated CI workflows, you may prefer to install the konnector manually instead of relying on kubectl-bind. Before applying the manifest, ensure you're using the latest konnector image by checking the latest version here.
To deploy the konnector manually, apply the following Kubernetes manifest:
apiVersion: v1
kind: Namespace
metadata:
  name: kube-bind
---
apiVersion: rbac.authorization.k8s.io/v1
kind: ClusterRole
metadata:
  name: klutch-bind-konnector
rules:
  - apiGroups: ["*"]
    resources: ["*"]
    verbs: ["*"]
---
apiVersion: rbac.authorization.k8s.io/v1
kind: ClusterRoleBinding
metadata:
  name: klutch-bind-konnector
roleRef:
  apiGroup: rbac.authorization.k8s.io
  kind: ClusterRole
  name: klutch-bind-konnector
subjects:
  - kind: ServiceAccount
    name: konnector
    namespace: kube-bind
---
apiVersion: v1
kind: ServiceAccount
metadata:
  name: konnector
  namespace: kube-bind
---
apiVersion: apps/v1
kind: Deployment
metadata:
  name: konnector
  namespace: kube-bind
  labels:
    app: konnector
spec:
  replicas: 2
  selector:
    matchLabels:
      app: konnector
  template:
    metadata:
      labels:
        app: konnector
    spec:
      restartPolicy: Always
      serviceAccountName: konnector
      containers:
        - name: konnector
          image: public.ecr.aws/w5n9a2g2/klutch/konnector:v1.4.0
          env:
            - name: POD_NAME
              valueFrom:
                fieldRef:
                  fieldPath: metadata.name
            - name: POD_NAMESPACE
              valueFrom:
                fieldRef:
                  fieldPath: metadata.namespace
By applying the provided manifest file, you only install the konnector component; the App Cluster is not yet bound to the Klutch API.
If you need to update an existing konnector deployment, follow the instructions on the Updating Klutch Components page.